Everything in pole vault starts with your hands. Before approach speed matters, before takeoff timing matters, before inversion matters — the grip and carry position are the foundation every other skill is built on. And yet this is the first thing beginners get wrong, and it’s often never fully corrected.
This guide covers the correct pole vault grip, hand spacing, carry height and angle, and the most common mistakes that coaches see at every level.
Why the Grip Matters More Than You Think
The pole is not a crutch. It’s a lever. To use it as a lever, you need a grip position that lets you control the pole throughout your approach, transmit force at takeoff, and allow the pole to bend without your body fighting it.
A poor grip creates a chain of compensations. Athletes with incorrect hand spacing tend to collapse at the top arm on takeoff, which kills pole bend. Athletes with a carry position that’s too low tend to struggle with the plant — the pole arrives late to the box and the jump stalls before it starts.
Fix the grip and carry, and a surprising number of other problems begin to fix themselves.
Top Hand Grip: What “Strong” Actually Means
Your top hand is your primary control point. Here’s how it should sit on the pole:
- Palm facing up (supinated) — not sideways, not facing down
- Wrap the thumb around the pole — this is the single most common error coaches see in beginners. Thumb under the pole means no stability; thumb wrapped around gives you purchase
- Fingers relaxed — you’re not squeezing the life out of the pole. A death grip creates tension in the forearm that transfers through the shoulder and restricts movement. Hold firmly but not rigidly
- Wrist position — neutral to slightly extended. Not bent back aggressively, not limp
Your top hand knuckles should face roughly forward when you’re in the carry position. If they’re facing the sky, your grip is rotated.
Bottom Hand Grip: The Guide, Not the Driver
The bottom hand is approximately shoulder-width below the top hand — typically 18–24 inches depending on your grip height. Its job is to guide the pole, not to carry it.
- Palm facing down (pronated) — opposite of the top hand
- Light grip pressure — the bottom hand stabilizes but doesn’t force. Many beginners squeeze with both hands equally; the bottom hand should be significantly more relaxed
- Elbow slightly bent — a fully locked bottom arm creates stiffness in the pole carry and makes the plant difficult
Hand Spacing: How Far Apart Should Your Hands Be?
This is where a lot of beginner instruction gets vague. The honest answer: hand spacing is determined by your grip height and your body proportions, and it should be set by a coach who can watch you run and plant. But as a starting point for most youth athletes:
- Taller athletes with a high grip tend toward wider spacing (22–28 inches)
- Shorter or developing athletes often start closer (16–20 inches)
The goal is a position that lets you push the pole forward and upward at takeoff without either arm collapsing. If your top arm folds in toward your face at takeoff, your spacing may be too narrow. If you can’t get the pole to the box at all, it may be too wide.
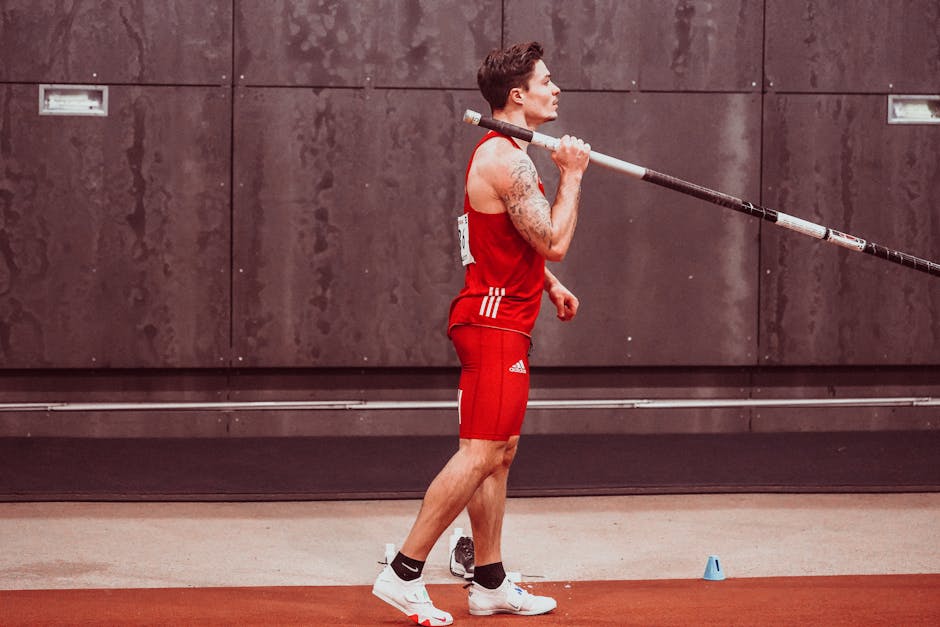
Carry Position: Height and Angle
How you carry the pole during your approach directly affects how fast the plant happens and how much the pole can contribute to your jump.
Height: The pole tip should be roughly eye level or slightly higher on your run-in. Too low means the pole has to travel a greater distance during the plant — it arrives late and you’re already past your best takeoff point. Too high creates control problems and a steep plant angle.
Angle: The pole should point downward toward the box at a shallow angle — approximately 20–35 degrees from horizontal for most athletes. Not flat (parallel to the ground), not steep (pointing sharply down). The pole is already “aimed” throughout the approach; the plant is a continuation of the carry path, not a separate action.
Grip hand position relative to the body: Your top hand should be held roughly in front of your hip at chest height during the approach. Not tucked against your body (which restricts the plant), and not extended way out in front (which requires extra muscular work to control).
The “Pole Drop” During the Approach: What Should Happen
One of the most common mistakes is athletes who start their approach with the pole tip high and then drop it dramatically in the last few strides. This is a symptom of a carry that’s too low combined with a plant that’s too late — the athlete is trying to get the pole into position at the last second.
The pole should drop gradually and continuously throughout the approach. You begin the approach with the tip slightly high (often head height or above), and by the time you reach your last stride, it’s already moving toward the box. The drop should be smooth and controlled — if it looks like a separate “throw” at the box, the carry position and plant timing need work.
Common Mistakes (and What They Cause)
Grip rotated inward (knuckles facing the ceiling): Causes the elbow to flare out. Athletes with this grip often miss the box to the right (for right-handed vaulters) and struggle with consistent plant angles.
Bottom hand too low on the pole: Reduces leverage and makes it extremely difficult to push the pole into the box. Also makes the approach feel unwieldy — the pole is harder to control because the lever arm is wrong.
Squeezing both hands equally hard: Creates shoulder tension that translates to a stiff, non-rotating torso on the approach. You want to stay tall and relaxed from hips through shoulders — rigid hands make that impossible.
Carrying the pole low and flat: The plant becomes a late, upward heave rather than a controlled continuation of the carry arc. This is one of the most common issues Coach Dopp sees in athletes coming to the Summer Series with a few years of experience — they’ve been carrying low so long it feels normal.
Thumb under the pole: Feels more natural to beginners because it’s closer to how you’d carry anything. But it removes almost all control and stability from the top hand grip. Thumb wraps around, always.
A Drill to Reinforce the Correct Carry
Walk-throughs are the best tool for ingraining carry position. No approach, no box — just walk forward with the pole in the carry position, focusing on:
- Tip at eye level or slightly above
- Top hand palm up, thumb wrapped
- Bottom hand palm down, relaxed
- Pole dropping gradually with each stride
Do 10–15 reps before every practice session. Athletes who do walk-throughs consistently develop a carry position that holds up under the pressure of a full approach — athletes who skip this step tend to revert to compensations the moment they add speed.
Getting Your Grip Fitted Correctly
Grip height and hand spacing aren’t arbitrary — they’re connected to your approach speed, pole flex, and physical proportions. If you’ve been vaulting for a while and still feel like you’re fighting the pole on every jump, your grip position is the first thing to check.
Private coaching sessions with Coach Dopp include grip evaluation as a standard part of the session. If you’re newer to the sport and in east Idaho, the Teton Vault Club covers carry position and grip fundamentals as part of the foundational curriculum — it’s one of the first things every new member works on.
Coach Dillon Dopp is the head pole vault coach at Thunder Ridge High School in Idaho Falls, ID. Questions about technique? Reach out directly or book a private session.