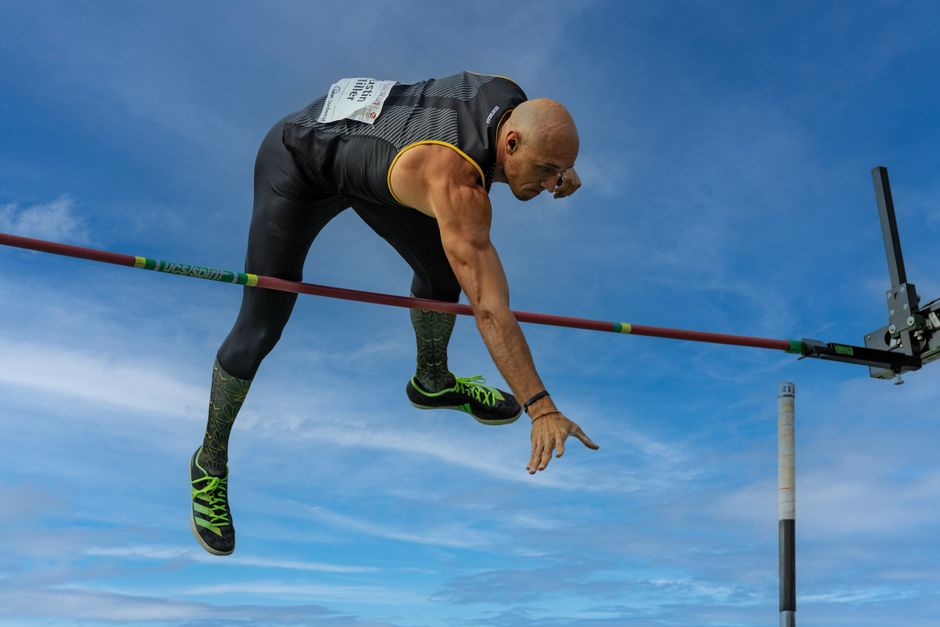
Here’s a hard truth about pole vault: what you feel on the runway and what actually happens on the runway are two different movies. You swear you were tall at takeoff. The camera says otherwise. That gap between feel and reality is the single biggest reason vaulters plateau — and it’s also the easiest one to fix, because you’re already carrying the tool in your pocket.
Filming yourself is one of the oldest tricks in coaching, and it still works. The coaching folks over at Karlie Place’s pole vault primer put it about as plainly as it can be put: film yourself, then compare what you see to good form. That’s it. That’s the whole method. The tricky part isn’t recording — it’s knowing what you’re looking at once you hit play.
So let’s fix that. Here’s how to shoot usable video, what to actually study in it, and how to turn what you see into a drill you can do tomorrow.
Why Video Beats Feel (Every Single Time)
Pole vault is, at its core, an energy problem. Team Hoot’s coaches boil the whole event down to one job: creating and transferring energy, and they’re quick to point out there are lots of ways to get that done. Training, technique, drills — all of it just serves that one purpose.
That framing matters for film study, because it tells you what to hunt for. You’re not looking for a picture-perfect position copied off a world champion. You’re looking for energy leaks — the moments where speed you built on the runway stops making it into the pole.
And energy leaks are almost always invisible from the inside. You can’t feel a shoulder that tensed up a tenth of a second early. You can see it. That’s the whole pitch.
Setting Up the Camera So the Video Is Actually Useful
Bad footage wastes your time. A few habits make every clip worth reviewing:
- Shoot from the side, level with the runway. A side-on view is the only angle that shows your takeoff position, your body line, and your swing all in one frame. Standing behind the box gives you a great highlight reel and almost no coaching information.
- Back up far enough to catch the last few steps and the top of the vault. If your takeoff is cropped out, you’ve lost the most important frames.
- Keep the camera still. A tripod, a fence post, a teammate’s water bottle — anything beats a shaky hand-held pan.
- Use slow motion or high frame rate if your phone has it. The plant and takeoff happen fast. More frames means more to actually see.
- Film the same view every session. Consistency is what lets you compare October to April.
- Get a wide clip of your sprint work, too. Karlie Place’s advice about filming sprints and comparing them to good running form applies directly — your approach is a sprint, and it’s where the whole vault is won or lost.
One more: label your clips. Pole, grip, step count, whatever your coach tracks. Three weeks from now you will not remember which jump was which.
What to Actually Look For, Phase by Phase
This is where most athletes stall out. They watch the clip five times, say “yeah that looked bad,” and learn nothing. Instead, watch each clip once per phase, looking for one thing at a time.
The crew at Learn to Pole Vault lay out the chain of cause and effect nicely — and it gives you a checklist:
| Phase | What Shapes It | The Error to Spot on Film |
|---|---|---|
| Takeoff | Takeoff angle and last-step mechanics shape the launch vector | Going off balance at takeoff — it flattens your launch vector |
| Transfer | Body posture, bottom arm action, and the stretch reflex control energy transfer into the swing | Tension in the shoulders, which blocks the swing |
| Swing | Swing timing and trail leg engagement influence how and when the pole recoils | Rushing or mistiming the swing relative to the pole |
| Turn | Timing determines your line around the bar | Delaying the turn and missing the window to finesse around the crossbar |
Notice how each row feeds the next. That’s the point — Learn to Pole Vault stresses that these pieces work as an integrated system, not as isolated tricks. So when you spot a problem on film, resist the urge to fix the symptom. A blocked swing usually isn’t a swing problem. It’s a shoulder-tension problem that started at the plant.
Work backward from the first error you see. If your takeoff is off balance, stop analyzing. Everything after it is a consequence, not a cause.
The Position Most Vaulters Get Wrong
Watch your plant frame by frame and pay attention to your top hand. Learn to Pole Vault describes what’s happening biomechanically during the plant: the lats, shoulders, and chest get briefly and rapidly stretched as the arms extend overhead and the pole starts to bend. That rapid stretch triggers the stretch reflex — the body’s automatic contraction response to fast lengthening — and skilled vaulters turn that into free, reflexive power.
Here’s the catch: you only get that reflex if you actually reach the extended position, and if you’re relaxed getting there. Tense athletes never load the stretch. Short-arming athletes never reach it. Both look fine in real time and both are obvious on film.
So on your plant frames, ask two questions:
- Am I genuinely tall and extended overhead, or am I catching the plant with bent arms and a collapsed chest?
- Am I relaxed through it, or is my top shoulder jammed up around my ear?
Karlie Place’s partner plant drill uses the cue “punch the sky” with the top hand at takeoff — an oversized pole plus a coach supporting it teaches proper pole bend and weight distribution through the plant. That cue is a great translation of what you’re trying to see on video.
Turning What You See Into a Drill
Film without a follow-up is just a hobby. Every clip should end with you picking one drill for the next practice. Some proven matches:
- You see a blocked or lazy swing → Try the high bar whip drill (via CoachTube), where the athlete swings and whips the left leg up to the bar with the right knee tucked under it, then draws the arms in to close the body. The whole point is feeling the whipping action that the vault demands. Learn to Pole Vault also recommends high-bar swing-ups specifically for building stretch-reflex awareness.
- Your last few steps look uneven or rushed → Use the 12-step plant walking drill. You hold the pole and walk through a counted eight-step rhythm, then three rapid steps into a plant on the fourth, simulating the takeoff without ever leaving the ground. It builds cadence and timing without beating up your legs.
- Your extension is short and you’re not driving through → The concept drill uses a resistance band from a seated athlete’s foot to the pole behind them; driving back onto the stomach into a hollow position with toes elevated forces real arm extension.
- Your body just doesn’t know where it is in the air → Pool vaulting. Push off the pole in shallow water, split the legs around the top arm, extend, turn, drive through. Low gravity buys you time to actually feel the sequence — and it’s genuinely fun, which matters more than coaches admit.
- Your sprint mechanics look sloppy → Film your straight-ahead sprints separately and compare to good running form. Karlie Place lists sprint form, lifting, and core strength as the three pillars for a reason: the faster you are on the runway, the higher you’ll jump.
For approach work, a few cone markers and a measuring tape turn “that felt about right” into a repeatable number. Both live in the TetonVault shop alongside everything else you need for a full practice setup.
When to Bring in a Second Set of Eyes
Self-analysis has a ceiling. You’ll catch obvious stuff — off-balance takeoffs, short plants, late turns. What you’ll miss is the why, especially when the root cause sits two phases upstream of the thing that looks wrong.
That’s exactly why online video review exists — Team Hoot offers one where you send your jumps in and get specific things to work on. Plenty of coaches do something similar. If you’re training without a dedicated vault coach on site, that outside look is worth every penny.
And if the film keeps showing the same problem no matter how many drills you throw at it, check your equipment before you blame your technique. A pole that doesn’t match your speed, weight, and grip will fight you on every rep. TetonVault carries UST-ESSX, Gill Pacer, and FiberSport poles across the full range from beginner training sticks to elite competition models — and picking correctly between them is a conversation, not a checkout button.
Start Tonight
You don’t need special software, a gimbal, or a coaching degree. You need a phone, a side angle, and the discipline to watch each clip looking for one thing.
Film three jumps at your next practice. Watch the takeoff only. Then watch the plant only. Write down the first error in the chain, pick the matching drill above, and run it next session. Do that for a month and you’ll know your own vault better than most athletes ever bother to.
Ready to make sure your gear isn’t the thing holding you back? Browse poles from UST-ESSX, Gill Pacer, and FiberSport, or reach out to Coach Dopp — he coaches vaulters in Idaho Falls year-round and is always happy to talk through what your film is telling you.